 My baking experiments thus far have been ‘belated’ so to speak – Peach Cobbler long after summer, Roasted butternut squash way past fall and this Pumpkin pie – month after Thanksgiving or rather week after Christmas!
“Better late than never” sounds like a tiny consolation and so, it is finally time to give it its due as this post languished in the drafts folder while I happily vacationed in South Padre Island this Christmas. Well, my earnest efforts to get it out published before I left didn’t quite suffice.
Pumpkin Pie as I have come to learn, is a near-sacred dish on the table, especially on Thanksgiving. And for quite the same freakish reason, as a Thanksgiving hostess, I couldn’t dare think of it, for it was my maiden attempt with a pie – any sort of, for that matter.
Much later on this particularly bright sunny day, almost a month after the feast, I felt a sense of conviction to take up this audacious task. Contrary to that, I hit upon a serious number of consecutive [alt+f4]s on my browsing excursion of a million pumpkin pie recipes (hyperbolical of course!). Most recipes had egg in them, many started with a store-bought pie crust and/or canned pumpkin purée while a whole bunch of others employed egg substitutes that were absent in my pantry. Sometimes, doesn’t it feel like even a sea of recipes at your fingertips is just not enough? For, you are in search of ‘the’ one elusive recipe that perfectly fits the bill and your idiosyncrasies, at that moment or for another day.

Just when I was fiddling with deliberation to call it quits, Anushruti’s Eggless Pumpkin Pie recipe on Divinetaste.com clicked like a flashbulb for, she baked it from scratch – just what I wanted! And, was I super glad to have stumbled upon such a fine use for a can of condensed milk waiting to be opened?
Or…You know, personally, when it comes to cooking and food, I don’t quite take offense if someone calls me a little conservative (read – a lot). While it may not hold true always, to the extent possible, I like to avoid canned goods and pre-processed items. Besides, I have a thing or two for doing stuff from scratch. Like I went through two days of intense labour devoid of pain killers ‘just’ to have a natural birth (not the best analogy, I know) – but that’s just me.
In hindsight, I might say, baking Pumpkin pie from scratch is quite laborious costing almost half a day. What makes it worth the while is, in spite of the endless list of my ‘shouldn’t haves’, the pie turned out silken solid, just the way it was meant to be. Boy, was it my ‘Martha moment’ at its first sight out of the oven or even as I jumped with joy after my first bite!

To sum it up, through this pie-(ad)venture, I came a long way from my initial prejudice – from pie can be intimidating for, pie is what only seasoned bakers bake to anyone can bake a pie!
Then, bottom line – Don’t bake this!
Wait a minute! I wasn’t done yet…
What I really meant is – Don’t take it up when you have too many things going on. P in Pie is definitely not for procrastination, it is a delicate product of all your attention.
A small note before you rush to the store: Don’t go hunting for those huge jack-o-lantern pumpkins. Leave them for carving on Halloween. Pumpkin pie calls for a much smaller ‘sugar’ pumpkin, the size of your spread palms held together. Jack-o-lantern pumpkins are supposedly raised more for durability than for their taste.
On that tiny note,
Here’s to my last post of 2010 and wish you a fulfilling, joyous and tasteful New Year 2011!

Packing off this Eggless Pumpkin Pie as my entry to:
The weekly “Bake-Off” event hosted by Champa of Versatile Vegetarian Kitchen at http://versatilekitchen.blogspot.com/p/bake-off-roundup.html
And
“Celebrating Regional Cuisine” (Nov 5th to Dec 31st) event hosted by Sujana of Sujana’s World at http://worldofsujana.blogspot.com/2010/11/celebrating-regional-cuisine.html

Things you’ll need:
Though most of the ingredients remain the same, there are a few subtle differences from the original
recipe. And, since we th are nuts about nuts, I couldn’t resist sprinkling some chopped pecans on top.

For the pastry pie crust:
1 cup 100% whole wheat flour
5 tbsp cold unsalted butter, cut into 1/2″ cubes frozen for 30 – 45 mins
1/2 tsp natural sea salt
1/3 cup (about 5 tbsp) ice-cold water
additional whole wheat flour for dusting/rolling
For the pumpkin purée filling:
2 cups pumpkin purée(from a small sugar pumpkin about 2-3 lbs)
1 can (400 g) fat-free sweetened condensed milk (I used eagle brand)
2 tbsp corn flour (corn starch)
1-1/2 tsp ground cinnamon
3/4 tsp freshly grated nutmeg (jaai kai)
1/2 tsp ground cloves
1/2 tsp ground dry ginger
1/2 tsp natural sea salt
1 tbsp non fat milk
2 tbsp chopped pecans for topping
Other kitchen supplies:
9″ pie pan (single use cake pans will do)
rolling pin
plastic cling wrap
whisk
silicone spatula
measuring cup and spoons
How it’s done:
As a first timer, I had felt the need to understand the recipe at a high level first so I knew exactly what to do next (like a roadmap), before following the step by step instructions in detail. Here are the main steps for baking a pumpkin pie from scratch: (If you happen to know it well, please bear with me!)
step 1 – Prepare dough for the pie crust
step 2 – Oven-roast the pumpkin
step 3 – Pumpkin purée
step 4 – Pastry Pie crust
step 5 – Pumpkin Pie filling
step 6 – Prepare the pie
step 7 – Bake the Pie

{Above, Pumpkin Pie in the making}
Here’s a quick overview of the steps as a little strategy for time management for that perfect pumpkin pie:
As the dough for the pie crust needs to rest in the fridge for an hour, first prepare the dough for the pie crust and stash it in the fridge. While the dough rests in the fridge, put the pumpkin to oven-roast as it needs almost an hour too. When the pumpkin has roasted well, let it cool off for a bit and then purée the cooked pumpkin. While the pumpkin cools off, roll out the pie crust and stash it back in the fridge for a quick much-needed “pie-crust-siesta”. While the crust chills, prepare the pie filling combined with the pumpkin pie spices. When the pie filling is ready, it’s time to preheat the oven to 425ºF and bring out the pie crust from the fridge. Then, just pour the pie filling into the pie crust and bake for a gorgeous pumpkin pie!
And, now for the details:
step 1 – prepare dough for the pie crust
Whisk together whole wheat flour and salt to mix well in a large mixing bowl. Alternately, sift the flour and salt to aerate and mix uniformly.
If you have a food processor, add frozen butter cubes to the flour and pulse few times until the mixture resembles a coarse meal, with many solid butter lumps here and there. Alternatively, a handheld pastry mixer does the job well too. As I had neither, I simply mixed with my hand. Just be careful enough to not over mix, as the body heat from your hand will melt the butter. Need to keep the butter solids intact for a flaky crust as opposed to a hard one.
Adding a spoon of ice-cold water as you go, mix the flour until barely mixed or just holds together when cupped in your palm. I did not have cold water in my fridge, so I added some ice cubes to the regular water and used instead. Do not over handle or knead the dough. Gather the dough into a ball, firmly cover this dough in a sheet of plastic cling wrap and store in the fridge for 30 mins to an hour – longer the better.
step 2 – Oven-roast the pumpkin
Preheat the oven to 350ºF
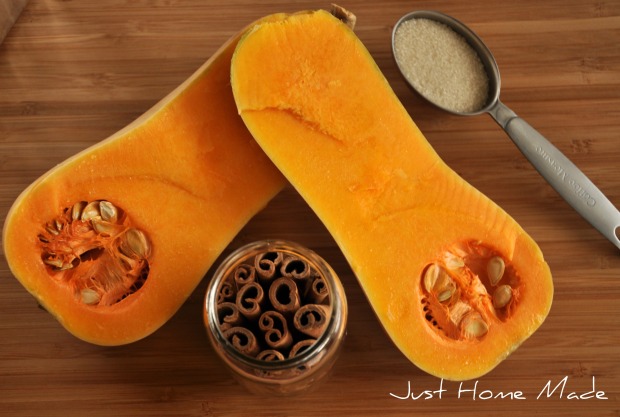
Wash the pumpkin. Using a chef’s knife, split it in half and remove the seeds and stringy fibre with a fork. Store the seeds aside for roasting at a later time or just discard. Then with a curved metal spoon, scoop out the remaining pith for a smooth inner surface.
To oven-roast, you can either choose to cut each half of the pumpkin further into four pieces or just let them be in two halves. In the first case, be very vigilant while baking as the pieces dry out when overdone.
Line a large baking tray with aluminium foil and place the pumpkin pieces face up or pumpkin halves face down and bake for about 45 mins or until fork tender. Many suggest lightly greasing the pumpkin pieces with a little oil, but I liked the idea of baking it by itself to preserve its natural taste and mild aroma.
step 3 – Pumpkin purée
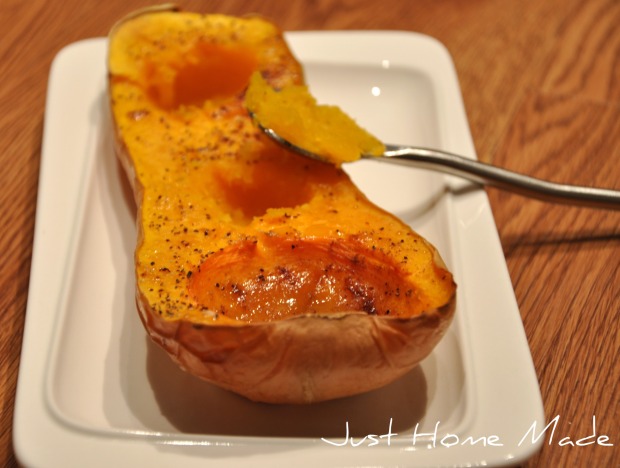
Let the roasted pumpkin cool off a bit for handling and blending. Then, hold down one end with a fork and with a curved metal spoon, scoop out the orangey good pulp into a bowl.
Throw the pulp chunks into a blender and pulse pulp into a smooth purée. Don’t worry if the roasted pumpkin is a little dry. Just add a tbsp or two of water while blending.
step 4 – Pie crust
Pull out the pie dough chilling in the fridge. Dust the working space with enough flour for rolling and pat out the dough on it. Using a rolling-pin, roll from the center and outwards (always) into 12″ (diameter) circle. If the edges break, just stick them back with your fingers.
For a uniform thickness, lift and move the rolled dough about a quarter turn as you roll. Do not press hard with your palm, instead work with your wrist to bring in the rotary movement.
To transfer the rolled pie crust onto the pie pan, dust off the extra flour, fold it in half and sliding your palms underneath, lift and gently place on the pie pan and then unfold over to the other side. Work with your fingers to give the crust a pan fit and tuck the overhanging dough onto itself making a decorative ruffle pattern for the pie crust border. Gently cover the pie crust with cling wrap and chill for about 30 mins or until pie filling is ready.
step 5 – Pie filling
Preheat the oven to 425ºF (so the oven is ready when the pie crust and filling are ready)
To the bowl with the pumpkin purée prepared earlier, pour in the condensed milk and add salt as well as all the spices listed under “for the pie filling”. Fresh spices make a whole world of difference in the taste and aroma of the pie, so use as fresh as possible. Stir corn flour well in 1 tbsp of milk until fully blended and add to the purée. Whisk all the ingredients together until smooth.
step 6 – Prepare the pie
Even though I sprinkled chopped pecans as-is for topping, in hindsight I wish I had them toasted beforehand. So, if you have chosen to add the pecan topping, toss the chopped pecans onto a microwave safe plate and microwave for about 2 mins in 30 sec intervals shuffling in-between or until slightly browned, aromatic and snap-cut when broken. Alternatively, you can even toast the pecans in the conventional oven at 350ºF for about 8 mins. I just found the microwave method convenient.
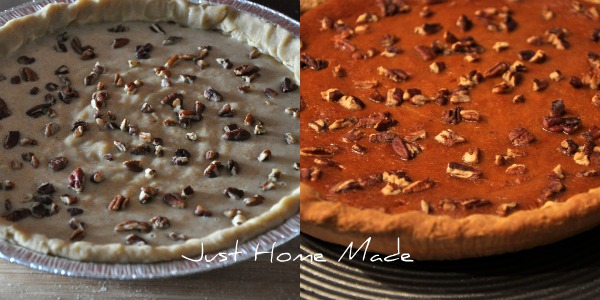
Now that the pie filling and pecans are ready, pull out the chilled pie crust from the fridge and pour pie filling into it. To not waste a single drop of this yummy purée, use a silicone spatula – it is more efficient than your own hands to get every drop of the purée out of the bowl. Finally, sprinkle toasted pecans on top.
step 7 – Bake the Pie
Place the pie pan on a large baking tray (to catch any spills) and bake the pie for the first 15 mins at 425ºF.
After 15 mins, cover the exposed pie with aluminium foil (to avoid a burnt crust) and bake for 45 mins at 350ºF or until a tooth pick inserted at from side of the pie crust comes out clean. Do not check in the center as a little jiggle in the center even after baking is supposed to be fine. It will set fine once the pie cools on the rack.
While baking, the pie filling might seem to puffingly rise a bit higher than the crust. Do not panic, it will settle down as it cools on the rack.
Let the baked pie cool on a wire rack. Serve at room temperature all by itself or with a scoop of vanilla ice-cream. Whipped cream is not my kind of ending to the pumpkin pie fairy tale.
A few suggestions to make life easier:
Prepare the pumpkin purée and the pie dough the day before and store it in the refrigerator. That way, not everything is crowded on one day and also saves you precious time and racing heart on the busy festive day.
However, if you neither have the time nor the patience for a completely homemade pie, don’t smother yourself with guilt. To simplify drastically,
Use canned purée – if so, choose organic pumpkin purée. Farmer’s market is a brand I found frequently recommended on many food blogs. They vouch for the quality, color, taste and consistency of their canned pumpkin purée.
Use store-bought puffed pastry dough for the pie crust – my buck stops here.
If all else fails, I suggest you find the driving directions to a nearby Kroger/Costco!

Lessons from my maiden pie venture:
I goofed up on a few things and sat there with fingers crossed so my very first pie turns out perfect. Some lessons I learnt and not ashamed to share:
Read the recipe and re-read to understand if needed. In the few baking episodes that I successfully attempted as a novice baker, I was so habituated to baking at 350ºF that I assumed the same for this pie too. Almost at the end of 45 mins when I just happened to check the recipe, I realized it should have been 400ºF instead. I tried setting right by extending the bake time twice by another 15 mins and toyed with a couple of different temperatures too. This temperature experiment, I felt left the pie crust a little tougher, albeit not burnt.
So, either put it for first 15 mins at 425ºF and then 45 mins for 350ºF or just do 45 mins at 400ºF. For more details on the pie baking temperature, dig here
I found this article particularly helpful as it cracks the various “Whys of the Pies” while offering fine tips for baking pumpkin pie:
http://www.finecooking.com/articles/why-pies-crack-shrink-tough-crumbly.aspx
I let the pumpkin wedges sit way too long in the oven instead of until fork-tender. As they turned out quite dry and I did not have any more pumpkins or canned pumpkin purée to fall back on, I quickly substituted with my toddler’s apple sauce (I know how that sounds, but I had to quickly salvage my maiden pie). Since I added 3 baby containers of pure applesauce, I added 1 tbsp cane sugar as well.
Do not cut into thin pieces as they dry out faster while roasting or just cut the pumpkin in half and roast in the oven cut face down. If you do not want to use the oven, microwave the pumpkin halves dunked in water.
Do not roll out the pie dough way too big. Just roll out 12″ in diameter and be precise, almost atleast. 9″ for the pie pan base and 3″ for the curves and sides. As I had bought a 10″ aluminium dish instead of 9″, my pie was less than 2″ deep after the pie filling – so, I had to tuck the dough in to level the pie crust with the filling.
Don’t forget to give the rolled pie crust some rest in the fridge before pouring in the pie filling. I took my own sweet time filling the pie, taking pictures for the blog and in all this, I forgot to stash the rolled pie crust to chill in the fridge.
To get the best pie crust, mix the dough with very little water as needed. Use ice-cold water and frozen butter. From what I’ve read, some even go to the extent of chilling the flour and salt too, in search of that perfect pie crust.
Kneading is a strict no-no. Do not thoroughly blend the butter into the flour. It is perfect if you can see bits and pieces of butter solids – for a flaky crust, not all the butter should melt. If you handle the butter a lot more, it will only end in a crumbly crust.




 If using frozen fruits like I did, thaw by placing the frozen bags on the counter for about 30 mins or microwave as per microwave re-heating directions.