Strawberry Chocolate Chip Muffin

Eggless Whole Wheat Strawberry Chocolate Chip Muffin | Valentine’s Day Special

I normally don’t believe in Valentine’s Day.

Roses, Strawberries and Chocolate are not my kind of Valentine’s day either. Yeah, probably twelve years back may be. Both of us are over and done with that phase of romance now, I guess. Nonetheless ironically, it seemed like ‘not a bad idea’ as a theme on the blog for Feb the 14th.

Besides, I have been yearning to eat strawberries the whole winter (happens only when we can’t get them right!) and now, the timing seems to be right as the northern crop has already hit the supermarkets.

I love strawberries by their fruity selves, not dipped in chocolate or any other way, smoothie may be an exception though.  This time, I thought I could do with a little change. I sometimes wondered how strawberries tasted in a baked product as I’d not heard of as many recipes as there are for blueberries. But, I was somehow not in the mood for any cake (possibly due to an overdose of cakes on all blogs I’ve been hopping lately). Cupcakes sounded very cute but you must know I am not much of a fan of whipped cream, so pass. Muffins (though they seemed like twins) on the other hand turned out to be a pretty neat option.

Does the thought of muffin and cake puzzle you like it did for me? Are they same, are they not?
Here’s some food for thought on Cupcakes vs Muffins from “Cake Spy”
With that definition, I don’t know if I left my muffins be muffins or dragged them into the cupcake arena!
Even though it felt like too much of a big deal, my requirement for an eggless whole wheat muffin with strawberries and chocolate chips finally did meet a recipe. Frosting and I are not the best of friends but, I did make the best use of some leftover frosting to dress up my muffins for Valentine’s day.
But don’t let yourself be restricted to just these muffin decorating ideas. Valentine’s day is definitely a time to let your imagination take control of your creativity!

Happy Valentine’s Day to you! Here’s to a day filled with love and lovely home made muffins..

What better way than a home made ‘something special’ to show someone you love? What say, you?

Strawberry Chocolate Chip Muffin Recipe

recipe adapted from Parita’s Kitchen

Makes about 12 small muffins
Printable Recipe
Things you’ll need:
For the muffins:
  • 1-1/2 cups whole wheat flour
  • 2 tsp aluminium-free baking powder
  • 1 tsp baking soda
  • 1/4 tsp salt
  • 1/3 cup cane sugar + 1/2 to 1 tbsp
  • 4 tbsp unsalted butter at room temperature
  • 1 tsp pure vanilla extract
  • 1/2 cup non fat greek yogurt
  • 3/4 to 1 cup non fat milk (or milk of your choice)
  • 1-1/4 cups chopped hulled strawberries (about 5-6 large strawberries)
  • 1/2 cup semi-sweet chocolate chips (I used 100% natural Ghirardelli)
Other things:
  • Baking tray/sheet pan
  • muffin pans (two 6 muffin pans)
  • paper muffin cups
  • whisk
  • Ice cream / cookie dough scoop ~ optional
  • wire rack
For the chocolate frosting:
(makes about 2 cups of frosting)
  • 1/2 cup (1 stick) unsalted butter at room temperature
  • 2/3 cup natural unsweetened Cocoa
  • 3 cups powdered sugar
  • 1/3 cup milk
  • 1 tsp pure vanilla extract
For Valentine’s day special decoration:
  • 2 tbsp confectioner’s sugar
  • tea strainer
  • 3/4″ paper or cardboard heart cutout
  • ziploc bag for frosting decoration
How it’s done:


To bake the strawberry muffins:
  • Taste the strawberries first. If the strawberries are not that sweet, macerate the strawberries in a clean non-reactive bowl by sprinkling 1/2 to 1 tbsp of sugar and let sit for the fruit to soak in for at least 15 mins. Skip this step if you think the strawberries are sweet by themselves.
  • Preheat the oven to 350ºF.
  • Line the muffin sheet with paper cups or grease with oil or butter.
  • Mean while, in a mixing bowl, combine whole wheat flour, baking soda, baking powder and salt and whisk/sift for thorough mixing.
  • To bring butter to room temperature, either let sit on the counter for 15-30 mins or just microwave for 10-12 secs until just soft. In another bowl, whisk the butter and sugar together until well combined and creamy. To this add the greek yogurt and 2/3 cup milk and whisk together. Finally whisk in the vanilla extract.
  • Now, add in the dry flour mix and whisk in slowly until it comes together. Add more milk as necessary a tbsp or two at a time as you go. Do not over mix. Fold in the chopped (macerated) strawberries and chocolate chips.
  • Scoop the dough into lined muffin cups only upto 3/4 th full to give enough room for the muffin to rise or else the dough will rise and spill out during baking . Place the muffin pans on a baking tray with at least 2-3 inches between them as well as with the inside of the oven for even hot air circulation. Bake for 25-30 mins or until a tooth pick inserted in the center comes out clean. Check around 25 mins for done-ness check. Do not overbake.
  • Remove the baked muffins from the tin and let cool immediately on a wire rack.
  • Serve warm or at room temperature as is or decorated with confectioner’s sugar heart impressions or chocolate drizzlings for the valentine’s day! (continue reading for recipe and how to)
Don’ts:
  • Do not open the oven door during the first 15 mins as it causes the rising muffin dough to collapse.
  • Do not forget or delay cooling the muffins on a wire rack right after pulling out of the oven. Otherwise, due to the retained heat, muffins start to sweat inside and end up soggy instead of fluffy.
How to make chocolate frosting:
recipe for Hersey’s “Perfectly Chocolate” chocolate Frosting from the back of Hershey’s Cocoa-Natural Unsweetened box
  • Melt butter in a saucepan until just soft or microwave for about 12-15 seconds. Stir in cocoa. Alternately add powdered (confectioner’s) sugar and milk, beating to “spreading” consistency. If you take a dollop out of a spoon it should fall but not flow freely. Add small amount of additional milk (a tsp or so) if needed. Stir in vanilla extract. Do not overmix.
Note: The ingredients listed (are) from the original recipe make a huge quantity of chocolate frosting.
I had leftover chocolate frosting from the chocolate almond cake I baked a month back and used the same. If you do not wish to make so much of the frosting, just halve the frosting recipe and store the leftovers in a plastic bag or airtight container in the refrigerator. Does not spoil for 3-4 weeks.
For the Valentine’s Day special muffins:
To make the heart impressions:
Place the paper heart cut-out on the muffin at the centre. Sprinkle confectioner’s sugar through a dry tea strainer until the top surface is covered. Remove the heart cut-out with a fork.
For the muffins with chocolate frosting:
Fill a ziploc bag with chocolate frosting, twist it tight and zip shut. Snip the tip of the ziplock bag just a tiny bit. Holding the other end of the bag secure, press and drizzle the chocolate frosting in a zig zag manner.


Note on Substitutions:
  • Baking Flour – I have always used regular whole wheat flour for baking cakes and love the ‘healthy’ taste of it. However, if you are not up for it, whole wheat flour can be substituted with whole wheat pastry flour or all purpose flour or a combination of both. The amount of milk required reduces considerably in which case, just start with 1/4 cup milk and add a tbsp at a time as you go as needed. Here’s a useful link that explains the difference between different baking flours.
  • Yogurt makes this muffin fluffy and airy. Regular yogurt may be used in place of greek yogurt (which is thicker and contains more protein than regular yogurt). Reduce the amount of milk accordingly as mentioned in flour substitution.
  • Blueberries should also work perfectly in place of strawberries.
  • Chocolate chips can be substituted with dry fruits like raisins or chopped pitted dates.
  • Single use aluminium muffin pans work very well and last for much more than a couple of uses. If you are not a frequent baker, feel free to buy them (costs <$3 for a set of 3 pans) in place of a more expensive regular/non-stick muffin pan.

Sending this Strawberry Chocolate Chip Muffin as my entry to these events:
The weekly Bake-Off event – Feb 18th Roundup hosted by Champa of Versatile Vegetarian Kitchen

Cooking with Fruit event hosted by Smita of Taste Buds

You might also like:

Kharjoor Badam Kheer

Almonds and Date Pudding

I wouldn’t totally like to call it a pudding, it is somewhat in between a pudding and a custard (yet neither), but I somehow like the sound of it

It was his birthday.
I had baked an Almond cake with chocolate frosting and buttercream icing for the midnight cake cutting celebrations, the day before.
Come morning, breakfast was simple, old-fashioned oats with fruit and nuts, just as usual like every other day. I had some idea on the menu for lunch – Kaduhu Ohre (kaduhoo oh ray) was surely one of them, it was his favourite after all. What I was undecided on was the dessert, goes without saying that I wished to conjure up something special eh? And then, there is a tradition back home, to make a payasam of some sort on festivals or for special occasions such as these. Even as a series of payasams made their entry and exit through my mind, I wasn’t quite convinced. What if I extend the almond theme to lunch as well? Some Medjool dates that I bought many days ago lay in silent meditation inside the refrigerator. How about showing them the path to salvation? Quite the choice, I quickly concluded.
I made a mental map and a rough sketch of  the ingredients, the method etc. One quick to-the-point call with my mom and a little googling later, my plan turned out concrete and ratified. Although, I won’t deny the temporary dilemma I was in, over Kheer* or Badam Burfi (Almond squares – popular Indian dessert) instead? You now know which prevailed!

Kharjoor Badam Kheer – An extremely exotic looking (and tasting too, don’t worry) yet deceptively easy to prepare dessert and a sumptuous one at it (of course, after all the expensive ingredients, it better be!). The crunch of fried cashews playing hide and seek in between the silky nuttiness of the almonds laced with the sweetness of the dates, the luminous sunset orangey hue of the saffron and rich fragrant aroma of cardamom makes this dessert almost divine – if you have someone you wish to wow, this ought to be your choice..

You know the best way to enjoy this Ambrosia? Once you are done with lunch (leave the dishes alone for once), pour it in your favourite color dessert dish with your favorite dessert spoon, curl yourself up on the couch (got any better place?) snuggled in between a few pillows (or your loved one!) and slowly lick away to almond wonderland…
Him and I and even our guest for the day Miss mmj loved it puddingy thick, suit yourself though – make it thinner if you so like it. After all, any food tastes best when tailored to one’s picky palette and individual nuances.
*Kheer is derived from the Sanskrit word Ksheera meaning milk

Kharjoor Badam Kheer Recipe

Printable Recipe
Things you’ll need:
  • 3/4 cup almonds
  • 1/2 cup pitted chopped dates (I used about 6-7 Medjool dates)
  • 1/4 cup cane sugar
  • 1/2 cup non fat milk
  • 4-5 cardamom pods, peeled and seeds powdered
  • 6-7 saffron strands
  • 10 cashews, chopped
  • 2 tsp ghee
  • 6-8 pistachios, slivered (optional)
How it’s done:
  • To blanch the almonds, place them in a bowl, pour boiling hot water and let sit covered for about 5-10 mins. Discard the water and run cold water over them. To skin the almonds, hold the almond on one end and gently squeeze to pop the skin off the almond. Repeat with the rest.
  • In a blender, grind skinned almonds and chopped dates along with a cup of water to a smooth paste.
  • Heat ghee in a thick bottomed pot over medium-high heat. When ghee is hot enough, add chopped cashews and shallow fry until golden brown. Strain cashews over a tissue and keep aside. Pour the date-almond smoothie into the thick bottomed pot and bring to a slow boil over medium-low heat stirring intermittently.
  • In a saucepan, bring milk to a boil or heat milk in a microwave for 1 min, add the saffron strands, stir and keep aside covered.
  • When Kheer starts bubbling, add the saffron milk and sugar and simmer for about 10 mins or until sugar is fully dissolved. Switch off, sprinkle ground cardamom, give it a good stir, cover and keep aside.
  • Serve warm (or cold) garnished with fried cashews or alternatively with slivered pistachios
Notes:
A mortar and pestle works best to powder cardamom seeds. Freshly ground is always the best, cardamom gradually loses flavor once ground.
Saffron yields color beautifully when in hot liquids (just like coffee) and hence added to hot milk.
At any given point, try not go beyond medium heat. You don’t want some precious dessert and $$ going down the drain, do you?
You might also like:

Eggless Pumpkin Pie from Scratch

My baking experiments thus far have been ‘belated’ so to speak – Peach Cobbler long after summer, Roasted butternut squash way past fall and this Pumpkin pie – month after Thanksgiving or rather week after Christmas!

“Better late than never” sounds like a tiny consolation and so, it is finally time to give it its due as this post languished in the drafts folder while I happily vacationed in South Padre Island this Christmas. Well, my earnest efforts to get it out published before I left didn’t quite suffice.

Pumpkin Pie as I have come to learn, is a near-sacred dish on the table, especially on Thanksgiving. And for quite the same freakish reason, as a Thanksgiving hostess, I couldn’t dare think of it, for it was my maiden attempt with a pie – any sort of, for that matter.

Much later on this particularly bright sunny day, almost a month after the feast, I felt a sense of conviction to take up this audacious task. Contrary to that, I hit upon a serious number of consecutive [alt+f4]s on my browsing excursion of a million pumpkin pie recipes (hyperbolical of course!). Most recipes had egg in them, many started with a store-bought pie crust and/or canned pumpkin purée while a whole bunch of others employed egg substitutes that were absent in my pantry. Sometimes, doesn’t it feel like even a sea of recipes at your fingertips is just not enough? For, you are in search of  ‘the’ one elusive recipe that perfectly fits the bill and your idiosyncrasies, at that moment or for another day.

Just when I was fiddling with deliberation to call it quits, Anushruti’s Eggless Pumpkin Pie recipe on Divinetaste.com clicked like a flashbulb for, she baked it from scratch – just what I wanted! And, was I super glad to have stumbled upon such a fine use for a can of condensed milk waiting to be opened?

Or…You know, personally, when it comes to cooking and food, I don’t quite take offense if someone calls me a little conservative (read – a lot). While it may not hold true always, to the extent possible, I like to avoid canned goods and pre-processed items. Besides, I have a thing or two for doing stuff from scratch. Like I went through two days of intense labour devoid of pain killers ‘just’ to have a natural birth (not the best analogy, I know) – but that’s just me.

In hindsight, I might say, baking Pumpkin pie from scratch is quite laborious costing almost half a day. What makes it worth the while is, in spite of the endless list of my ‘shouldn’t haves’, the pie turned out silken solid, just the way it was meant to be. Boy, was it my ‘Martha moment’ at its first sight out of the oven or even as I jumped with joy after my first bite!

To sum it up, through this pie-(ad)venture, I came a long way from my initial prejudice – from pie can be intimidating for, pie is what only seasoned bakers bake to anyone can bake a pie!

Then, bottom line – Don’t bake this!

Wait a minute! I wasn’t done yet…

What I really meant is – Don’t take it up when you have too many things going on. P in Pie is definitely not for procrastination, it is a delicate product of all your attention.

A small note before you rush to the store: Don’t go hunting for those huge jack-o-lantern pumpkins. Leave them for carving on Halloween. Pumpkin pie calls for a much smaller ‘sugar’ pumpkin, the size of your spread palms held together. Jack-o-lantern pumpkins are supposedly raised more for durability than for their taste.

On that tiny note,

Here’s to my last post of 2010 and wish you a fulfilling, joyous and tasteful New Year 2011!

Packing off this Eggless Pumpkin Pie as my entry to:

The weekly “Bake-Off” event hosted by Champa of Versatile Vegetarian Kitchen at http://versatilekitchen.blogspot.com/p/bake-off-roundup.html

And

“Celebrating Regional Cuisine” (Nov 5th to Dec 31st) event hosted by Sujana of Sujana’s World at http://worldofsujana.blogspot.com/2010/11/celebrating-regional-cuisine.html

Things you’ll need:

Though most of the ingredients remain the same, there are a few subtle differences from the original
recipe. And, since we th are nuts about nuts, I couldn’t resist sprinkling some chopped pecans on top.

For the pastry pie crust:
1 cup 100% whole wheat flour
5 tbsp cold unsalted butter, cut into 1/2″ cubes frozen for 30 – 45 mins
1/2 tsp natural sea salt
1/3 cup (about 5 tbsp) ice-cold water
additional whole wheat flour for dusting/rolling

For the pumpkin purée filling:

2 cups pumpkin purée(from a small sugar pumpkin about 2-3 lbs)
1 can (400 g) fat-free sweetened condensed milk (I used eagle brand)
2 tbsp corn flour (corn starch)
1-1/2 tsp ground cinnamon
3/4 tsp freshly grated nutmeg (jaai kai)
1/2 tsp ground cloves
1/2 tsp ground dry ginger
1/2 tsp natural sea salt
1 tbsp non fat milk
2 tbsp chopped pecans for topping

Other kitchen supplies:
9″ pie pan (single use cake pans will do)
rolling pin
plastic cling wrap
whisk
silicone spatula
measuring cup and spoons

How it’s done:

As a first timer, I had felt the need to understand the recipe at a high level first so I knew exactly what to do next (like a roadmap), before following the step by step instructions in detail. Here are the main steps for baking a pumpkin pie from scratch: (If you happen to know it well, please bear with me!)

step 1 – Prepare dough for the pie crust
step 2 – Oven-roast the pumpkin
step 3 – Pumpkin purée
step 4 – Pastry Pie crust
step 5 – Pumpkin Pie filling
step 6 – Prepare the pie
step 7 – Bake the Pie

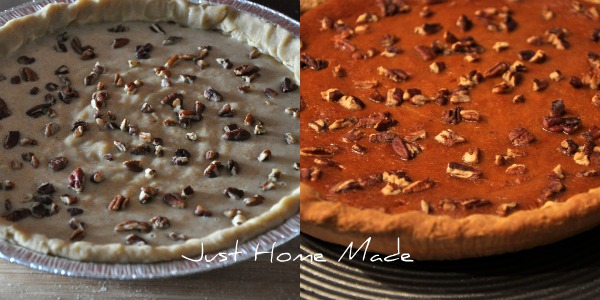
{Above, Pumpkin Pie in the making}

Here’s a quick overview of the steps as a little strategy for time management for that perfect pumpkin pie:

As the dough for the pie crust needs to rest in the fridge for an hour, first prepare the dough for the pie crust and stash it in the fridge. While the dough rests in the fridge, put the pumpkin to oven-roast as it needs almost an hour too. When the pumpkin has roasted well, let it cool off for a bit and then purée the cooked pumpkin. While the pumpkin cools off, roll out the pie crust and stash it back in the fridge for a quick much-needed “pie-crust-siesta”. While the crust chills, prepare the pie filling combined with the pumpkin pie spices. When the pie filling is ready, it’s time to preheat the oven to 425ºF and bring out the pie crust from the fridge. Then, just pour the pie filling into the pie crust and bake for a gorgeous pumpkin pie!
And, now for the details:

step 1 – prepare dough for the pie crust

Whisk together whole wheat flour and salt to mix well in a large mixing bowl. Alternately, sift the flour and salt to aerate and mix uniformly.
If you have a food processor, add frozen butter cubes to the flour and pulse few times until the mixture resembles a coarse meal, with many solid butter lumps here and there. Alternatively, a handheld pastry mixer does the job well too. As I had neither, I simply mixed with my hand. Just be careful enough to not over mix, as the body heat from your hand will melt the butter. Need to keep the butter solids intact for a flaky crust as opposed to a hard one.

Adding a spoon of ice-cold water as you go, mix the flour until barely mixed or just holds together when cupped in your palm. I did not have cold water in my fridge, so I added some ice cubes to the regular water and used instead. Do not over handle or knead the dough. Gather the dough into a ball, firmly cover this dough in a sheet of plastic cling wrap and store in the fridge for 30 mins to an hour – longer the better.

step 2 – Oven-roast the pumpkin

Preheat the oven to 350ºF

Wash the pumpkin. Using a chef’s knife, split it in half and remove the seeds and stringy fibre with a fork. Store the seeds aside for roasting at a later time or just discard. Then with a curved metal spoon, scoop out the remaining pith for a smooth inner surface.

To oven-roast, you can either choose to cut each half of the pumpkin further into four pieces or just let them be in two halves. In the first case, be very vigilant while baking as the pieces dry out when overdone.

Line a large baking tray with aluminium foil and place the pumpkin pieces face up or pumpkin halves face down and bake for about 45 mins or until fork tender. Many suggest lightly greasing the pumpkin pieces with a little oil, but I liked the idea of baking it by itself to preserve its natural taste and mild aroma.

step 3 – Pumpkin purée

Let the roasted pumpkin cool off a bit for handling and blending. Then, hold down one end with a fork and with a curved metal spoon, scoop out the orangey good pulp into a bowl.

Throw the pulp chunks into a blender and pulse pulp into a smooth purée. Don’t worry if the roasted pumpkin is a little dry. Just add a tbsp or two of water while blending.

step 4 – Pie crust

Pull out the pie dough chilling in the fridge. Dust the working space with enough flour for rolling and pat out the dough on it. Using a rolling-pin, roll from the center and outwards (always) into 12″ (diameter) circle. If the edges break, just stick them back with your fingers.

For a  uniform thickness, lift and move the rolled dough about a quarter turn as you roll. Do not press hard with your palm, instead work with your wrist to bring in the rotary movement.

To transfer the rolled pie crust onto the pie pan, dust off the extra flour, fold it in half and sliding your palms underneath, lift and gently place on the pie pan and then unfold over to the other side. Work with your fingers to give the crust a pan fit and tuck the overhanging dough onto itself making a decorative ruffle pattern for the pie crust border. Gently cover the pie crust with cling wrap and chill for about 30 mins or until pie filling is ready.

step 5 – Pie filling

Preheat the oven to 425ºF (so the oven is ready when the pie crust and filling are ready)

To the bowl with the pumpkin purée prepared earlier, pour in the condensed milk and add salt as well as all the spices listed under “for the pie filling”. Fresh spices make a whole world of difference in the taste and aroma of the pie, so use as fresh as possible. Stir corn flour well in 1 tbsp of milk until fully blended and add to the purée. Whisk all the ingredients together until smooth.

step 6 – Prepare the pie

Even though I sprinkled chopped pecans as-is for topping, in hindsight I wish I had them toasted beforehand. So, if you have chosen to add the pecan topping, toss the chopped pecans onto a microwave safe plate and microwave for about 2 mins in 30 sec intervals shuffling in-between or until slightly browned, aromatic and snap-cut when broken. Alternatively, you can even toast the pecans in the conventional oven at 350ºF for about 8 mins. I just found the microwave method convenient.

Now that the pie filling and pecans are ready, pull out the chilled pie crust from the fridge and pour pie filling into it. To not waste a single drop of this yummy purée, use a silicone spatula – it is more efficient than your own hands to get every drop of the purée out of the bowl. Finally, sprinkle toasted pecans on top.

step 7 – Bake the Pie
Place the pie pan on a large baking tray (to catch any spills) and bake the pie for the first 15 mins at 425ºF.

After 15 mins, cover the exposed pie with aluminium foil (to avoid a burnt crust) and bake for 45 mins at 350ºF or until a tooth pick inserted at from side of the pie crust comes out clean. Do not check in the center as a little jiggle in the center even after baking is supposed to be fine. It will set fine once the pie cools on the rack.
While baking, the pie filling might seem to puffingly rise a bit higher than the crust. Do not panic, it will settle down as it cools on the rack.

Let the baked pie cool on a wire rack. Serve at room temperature all by itself or with a scoop of vanilla ice-cream. Whipped cream is not my kind of ending to the pumpkin pie fairy tale.


Note –

A few suggestions to make life easier:

Prepare the pumpkin purée and the pie dough the day before and store it in the refrigerator. That way, not everything is crowded on one day and also saves you precious time and racing heart on the busy festive day.

However, if you neither have the time nor the patience for a completely homemade pie, don’t smother yourself with guilt. To simplify drastically,

Use canned purée – if so, choose organic pumpkin purée. Farmer’s market is a brand I found frequently recommended on many food blogs. They vouch for the quality, color, taste and consistency of their canned pumpkin purée.

Use store-bought puffed pastry dough for the pie crust – my buck stops here.

If all else fails, I suggest you find the driving directions to a nearby Kroger/Costco!


Lessons from my maiden pie venture:

I goofed up on a few things and sat there with fingers crossed so my very first pie turns out perfect. Some lessons I learnt and not ashamed to share:

Read the recipe and re-read to understand if needed. In the few baking episodes that I successfully attempted as a novice baker, I was so habituated to baking at 350ºF that I assumed the same for this pie too. Almost at the end of 45 mins when I just happened to check the recipe, I realized it should have been 400ºF instead. I tried setting right by extending the bake time twice by another 15 mins and toyed with a couple of different temperatures too. This temperature experiment, I felt left the pie crust a little tougher, albeit not burnt.

So, either put it for first 15 mins at  425ºF and then 45 mins for 350ºF or just do 45 mins at 400ºF. For more details on the pie baking temperature, dig here

I found this article particularly helpful as it cracks the various “Whys of the Pies” while offering fine tips for baking pumpkin pie:

http://www.finecooking.com/articles/why-pies-crack-shrink-tough-crumbly.aspx

I let the pumpkin wedges sit way too long in the oven instead of until fork-tender. As they turned out quite dry and I did not have any more pumpkins or canned pumpkin purée to fall back on, I quickly substituted with my toddler’s apple sauce (I know how that sounds, but I had to quickly salvage my maiden pie). Since I added 3 baby containers of pure applesauce, I added 1 tbsp cane sugar as well.

Do not cut into thin pieces as they dry out faster while roasting or just cut the pumpkin in half and roast in the oven cut face down. If you do not want to use the oven, microwave the pumpkin halves dunked in water.

Do not roll out the pie dough way too big. Just roll out 12″ in diameter and be precise, almost atleast. 9″ for the pie pan base and 3″ for the curves and sides. As I had bought a 10″ aluminium dish instead of 9″, my pie was less than 2″ deep after the pie filling – so, I had to tuck the dough in to level the pie crust with the filling.

Don’t forget to give the rolled pie crust some rest in the fridge before pouring in the pie filling. I took my own sweet time filling the pie, taking pictures for the blog and in all this, I forgot to stash the rolled pie crust to chill in the fridge.

To get the best pie crust, mix the dough with very little water as needed. Use ice-cold water and frozen butter. From what I’ve read, some even go to the extent of chilling the flour and salt too, in search of that perfect pie crust.

Kneading is a strict no-no. Do not thoroughly blend the butter into the flour. It is perfect if you can see bits and pieces of butter solids – for a flaky crust, not all the butter should melt. If you handle the butter a lot more, it will only end in a crumbly crust.

Peach Cherry Blueberry Cobbler

For the most part of my cooking life, I have shied away from baking.
Since I happen to be a strict vegetarian who does not eat eggs, I grew up with a strong mental block toward baking as real baking to me, was non-existent without eggs. And with a similar lineage to boast of, there was no one to tell any other way.
Besides, I had written off baking as something ‘not my cup of tea’. No wonder, for a person who’s cooking instincts are driven mostly by approximation and eyeballing.
But, years later it so happened that one fine day out of the blue, all I wanted to do was bake. Can’t recall if it was my hard-to-please toddler or my foodie husband who kindled my baking desire, but google surely added fuel to this blazing fire. Not only were my hard clenched myths busted, I also learnt the endless possibilities of eggless baking through a number of dedicated bloggers.
Since then and now, I cannot seem to stop thinking about it – I wouldn’t be writing about Peach Cobbler here, otherwise! I am glad to be portraying a different story today, to have discovered baking in the new light ‘cos the joy it brings to my heart, the chef in me can only dream about.
The first time I ate Peach Cobbler was when Al, wife of K’s childhood friend baked it during our visit to see their newborn in Phili early spring, this year. In her earnest effort to take great care of our egg-free food preferences, she had chosen this dessert recipe. With nothing more to say, I had taken to it almost instantly and also got the recipe from her right away.
But it took a whole summer long wait and Thanksgiving for me to finally bake it – A warm summer dessert to welcome winter! Needless to say, it was a big hit that left us asking for more. So, when it came to sending our dessert entry for his christmas potluck lunch party at office the other day, it was none other than this Peach Cobbler that topped my mind.

Baking a Peach Cobbler was almost like child’s play even to me, a novice baker. But, here are a few things I have picked up along the way:
Baking is a magical art in itself and a lot of science coupled with it. If the strict measurements aren’t followed to the ‘T’, the alchemy of turning batter to cake morphs into a kitchen experiment gone awry.
The best part about baking is not in the baking, but in the feeding of others thereafter. And the worst part, is the need to balance relishing with moderation ‘cos a slim waist and a lot of baking aren’t a couple made for each other.
Just remember this simple rule of thumb for baking, “Dry (ingredients) first, wet later”. Now let’s go bake that Peach Berry Cobbler..

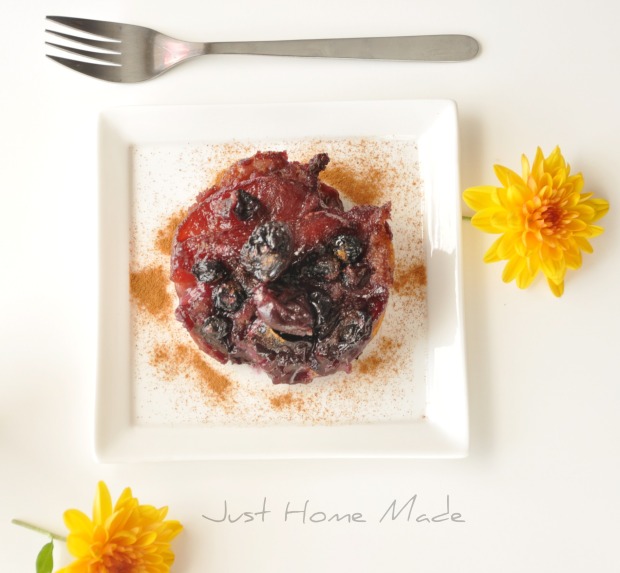
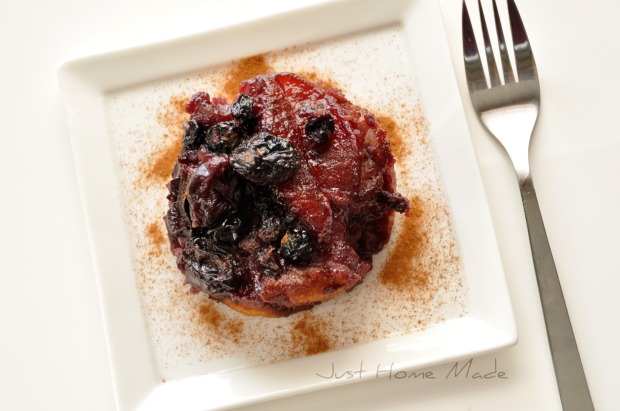
I ran out of Peaches, so filled in for their sunshine hue with bright yellow homegrown chrysanthemums

recipe source: Foodnetwork.com| Paula Deen Show: Paula’s Home Cooking

In all due respect for Paula Deen, if you have watched her show on Food Network, you’ll know why I have reduced sugar and butter in half. No wonder America is an obese nation!
A few changes in my version besides the reduced sugar and butter:
  • I had only two cups of frozen peaches, so I added a cup each of the cherries and blueberries.
  • I wasn’t kicked about buying self-raising flour only for this bake. Besides, I do not use all-purpose flour, so substituted with 100% whole wheat flour (yes – same as chapati atta), baking powder and salt.
  • I used natural cane sugar instead of refined white sugar.
  • And finally, I have used non fat milk to render it a guilt-free indulgence
BTW, this is my entry to the Bake-Off event hosted by Champa of Versatile vegetarian Kitchen at http://versatilekitchen.blogspot.com/p/bake-off-roundup.html
Things you’ll need:
For the fruit topping
  • 2 cups frozen or fresh peaches
  • 1 cup frozen or fresh cherries
  • 1 cup frozen or fresh blueberries
  • 1/2 cup natural cane sugar
  • 1/2 cup water
For the batter
  • 1-1/2 cups 100% whole wheat flour
  • 2 tsp baking powder
  • 1 tsp salt
  • 1/2 cup natural cane sugar
  • 1-1/2 cups non fat milk
Other
  • 4 tbsp butter
  • ground cinnamon (optional)
How it’s done:

When baking, follow directions.  When cooking, go by your own taste.  ~Laiko Bahrs
  • If using frozen fruits like I did, thaw by placing the frozen bags on the counter for about 30 mins or microwave as per microwave re-heating directions.
  • Preheat oven to 350°F
  • Combine the thawed peach slices, cherries and blueberries in a saucepan along with 1/2 cup cane sugar and 1/2 cup water to mix well. Bring to a boil and then simmer for about 10 mins until the liquid is syrupy and keep aside.
  • Place butter in a baking dish (I used a 9″x7″x3″ rectangular dish) to melt in the oven or the microwave.
  • In a large mixing bowl, whisk together the flour, baking powder, salt and the remaining 1/2 cup sugar. Alternatively, you can also sift the flour to aerate. Now gently whisk this mixture with the milk to avoiding any clumps. Do not over mix at this point.
  • Gently pour this batter over the melted butter in the baking dish without stirring the butter. Batter will rise to the top while baking.
  • Spoon cooked fruit on top gently pouring the syrup as well. If you feel, there is just too much syrup, keep some aside to drizzle on top before serving. Sprinkle ground cinnamon (if you chose to) over the top and bake for 40-45 mins or until a fork slid inside comes out clean.
  • Serve warm with fruit syrup (kept aside) drizzled over and/or with a dollop of vanilla ice-cream on the side.
Note:
When buying baking powder, always choose one that is aluminum free. Rumford is the most popular brand and I found it  in WholeFoods store.
As per Wiki, people who prefer not to use baking powder with aluminum do so because they believe it gives food a vaguely metallic taste and because of a possible link between aluminum consumption and Alzheimer’s disease. As for me, if a brand exclusively says aluminuim-free, there must be sufficient reason to not use the product ‘with’ aluminium (of course the same logic doesn’t apply to anything and everything!)
As much as I loved the Peach Cobbler with a splash of blueberry and cherry colors, I would have loved to have the sunshine golden-yellow of the peaches intact. So next time I bake this, I probably will consider cooking the berries and peaches in sugar separately.
In case you wish to reduce the butter further, try substituting 2 tbsp butter with 2 tbsp flavorless oil of your choice. Not that I am a big butter supporter, but not sure of the end result if/when butter is substituted entirely.

Frozen cherries and blueberries with balcony grown chrysanthemums