Sakkare Acchu

Sugar mould figurines

Wow! The last time I thought it was the beginning of a new year, blink and almost a  fortnight has vanished just like that. I knew the days are passing by really fast, but this year, it seems faster than I expected. Weeks are passing by like days, or is it just me?

And, Sankranthi is already here!

I had been looking forward to this day of the year to make Sakkare Acchu right from Deepavali last year. Luckily enough, I got the traditional wooden moulds well in time from India. So, for the very first time in my life, I made Sakkare Acchu. And, it feels like a humongous achievement!

The vision that I always had, of learning it from my mom, making it side by side in her kitchen and she teaching me how to stir the sugar with her arthritic hands though, did not become reality. My mom refused to teach me over the phone as she felt it was way too complicated to explain the nuances of this art form for someone who had zilch as experience. Since my requests for lessons over phone went futile, I made it all by myself on a quiet afternoon early this week after watching my friend do it in her kitchen.

Proof is right in front of you and even now I wonder, if it was beginner’s luck or did I really get it? I don’t mean to brag nor do I want to scare you, but I have seen my aunt struggle to get the right consistency, ending up with burnt brown caramel many a times. May be, mom was apprehensive that even I’d end up with a whole lot of wasted effort and burnt sugar without her hand holding. Whatever it was, I am super glad I tried.

Sakkare Acchu is a wonderful art form, very local to some parts of Karnataka, mostly in and around Bangalore, Mysore, Hassan, Mandya and few other parts. One needs a lot of patience, time and of course sugar to make it. And, these days no one likes sugar, isn’t it? There’s no wonder why it is a dying art form.

I never ate Sakkare Acchu as a kid. I would promptly refuse, I couldn’t imagine eating something so intensely sugary. After twenty years, I don’t think I have a different opinion. But, what drives me so much to learn how to make it, is the simple reason that I want to be the bridge to my next generation, for, if I know, there is a sliver of hope that my daughter has a solid chance to learn someday.

{Sugar syrup just poured into the wooden moulds}

Sankranthi (in India) marks the end of winter and the movement of the sun into the northern hemisphere known as “Uttarayana” indicating longer sunnier days. Sankranthi and Uttarayana both are sanskrit words. Unlike other Hindu festivals for which the exact date varies from year to year based on the lunar calendar, the date of Makara Sankranthi remains fairly constant between 14th and 15th of January year after year.

In most parts of India including Karnataka, it is a major harvest festival celebrated with much fervor. I find the origin of local customs and rituals depending upon the cultural, geographical, agricultural, religious and social influences, around this festival very fascinating. As Sankranthi also happens to be the day of first harvest of sugarcane in Karnataka, historically, it feels natural that this brilliant art form of making sugar mould figurines “Sakkare Acchu”, must have been born out of the need to celebrate the abundance of sugarcane and to share the recent harvest with others as decorative giveaways.

Things that I took for granted as a kid, enjoyed as part of the vivacity of the festival, has a much deeper meaning to me now.

Home made acchu is the purest way to enjoy these beauties. You never know the additives in the store-bought ones!

Tulsi katte (Tulsi pot) has got to be my all time favorites..

{The aftermath of Sakkare Acchu!}

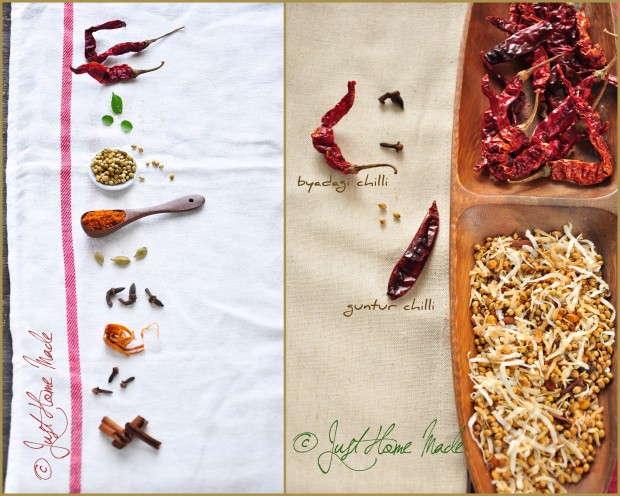
Here’s a comparison of the outcome of experiments with varied ingredients. Hope you get some idea.

I can completely understand if this recipe gives you creeps at the very thought of trying. Most people are; even I was, until I tried.
Sakkare Acchu by MyIndiaRecipe is the single relevant video I found on YouTube on this topic. The Grandma in the video is not only adorable (even without appearing) has done a great job of explaining. Watch it if you are really interested to make Sakkare Acchu and need visual cues.

Wish you all a very happy and prosperous Pongal and Sankranthi. May your year be filled with abundance in food, love, peace, harmony, health and happiness and may you share it with all your near and dear ones..

Happy Sankranthi!

SAKKARE ACCHU RECIPE

Printable Recipe
Things you’ll need:
makes about 12-15 small figurines
(depending upon the size of the mould)
1 cup white sugar

1/2 cup water

2 tbsp milk (I used 1% milk)

1/2 lemon~ optional

Other:

Traditional Wooden moulds

soft cotton cloth with a high thread count

firm rubber bands

How it’s done:

Wash and soak the wooden moulds in water for a few hours or overnight.

Add water to sugar in a heavy bottomed saucepan and let soak or dissolve for a few hours.

Just before embarking on the Sakkare Acchu making, pat dry the moulds with a cloth, assemble and secure tightly with firm and preferably broad width rubber bands.

Spread the soft cotton cloth over another saucepan to ready it for straining the sugar solution. Bring the sugar solution to a gentle boil over medium heat and add 1 tbsp milk. Let it boil for a minute or so, until the milk solids float to the top appearing as scum. Strain it over the soft cotton cloth readied earlier. You’ll see the milk solids are trapped on the cloth leaving a mildly cloudy sugar solution behind.

Pour the filtered sugar solution to the first saucepan and bring it to a boil again over medium heat. Add the remaining 1 tbsp milk and repeat the straining process as above. This twice filtered cloudy sugar solution is the starting point for the sakkare acchu. And since sakkare acchu is better made in small batches (easier to find the right consistency without burning), divide this sugar solution into two parts.

Keep a shallow bowl of water next to the stove to check for the desired sugar consistency (if you are a beginner).

Bring half the sugar solution in the saucepan to a gentle bubble (not boil) over low heat. Take the saucepan off the stove and stir well with a ladle in a beating manner, about 5-6 times. Return to the stove and repeat this process for up to ten times. Do not increase the heat at any given point. If you are a beginner, after each time, drip a sugar droplet into the bowl of water to check for the consistency required. In the beginning, as soon as you drop, it will dissolve immediately; as we near the required consistency, the sugar drop stays put in the same place and can be rolled into a soft ball. This is the cue.

By this time, you will also notice that the sugar solution is beginning to thicken and appear creamy and you can see a plethora of tiny bubbles.

You can say the desired consistency is reached when, as you beat the sugar solution off the stove for almost the 8th, 9th or 10th time, the beating itself is very quiet and you just hear the liquid moving very smoothly as if the sugary liquid is insulating the ladle from the saucepan bottom. Beating removes air bubbles if any.

Optionally, now add a few drops of lemon juice before pouring out the syrup to add a hint of lemony flavor to it.

Beating it again a couple of times, ladle out this liquid swiftly into the secured moulds until the liquid covers the top, starting with a mould with the smallest opening. This is because, the sugar syrup can thicken in a matter or 4-5 seconds and be difficult to pour.

Let the moulds sit aside to solidify for about 20 mins before opening.

Repeat with the remaining half sugar solution.

To remove the acchu, use a sharp knife to trim the extras on the mould. Do not waste the extras or spilled pieces, just include them into your next batch.

Remove the rubber bands and gently loosen the moulds. Remove the sakkare acchu  when still slightly wet, gently pressing at the top where it was poured into. It is normal for the acchu to appear glazed or wet with a runny sugary liquid below the moulds.

Arrange them on a clean dry plate and let dry for an hour or two until completely dried. Store in a dry airtight container.

What if the sugar solution is not coming to a boil?

Ratio of water to sugar is approximate. You’ll need a little more than just enough water to cover the sugar or the sugar solution will not have enough water to come to a boil. Add a little water and try again.

Sakkare Acchu does not solidify or melts in place

Problem could be there’s too much milk making Sakkare Acchu too soft to solidify.

Too little or no milk will make it too crystalline to show off its design. This is a reason why milk is added. Milk lets the design show well by giving it just the right amount of opacity. Adding a little milk is also the secret to getting melt-in-your-mouth Sakkare Acchu or they end up being hard. Also, when added, milk (and even yogurt) boils forming a scum like layer on top. When filtered, it takes away any impurities or dark spots in sugar as well.

My aunt’s version:

1 cup sugar

1 cup water

2 tbsp yogurt

1/4 cup milk

Some people like my aunt even believe in adding yogurt apart from milk. Start with yogurt for the first iteration and for the next two iterations, use half the milk for each, filtering with a soft cloth at every stage.

Benefit of doing this is, remnants of the acidity of yogurt in the sugar solution get the milk solids to separate well and little or no milk solids remain in the sugar solution thereafter.

Everything else is the same as explained above.

Notes

These stay well for up to a month. Do not refrigerate.

Alternatively, you could use candy/chocolate moulds in place of the wooden moulds.  I’d prefer wooden moulds any day as I’d rather not deal with worrying about the effects of hot syrups ending up in plastic/silicone.

Color of Sakkare Acchu depends on the sugar. Raw/cane/brown sugar will result in pale brown color.

Let the wooden moulds dry completely before storing away or they get moldy.

Now that you know what it takes to make these beauties, if someone gives you a homemade acchu and it is not up to your taste buds, do not discard them. Instead, accept them with a smiley face and use them in place of regular sugar in your hot beverages.

Can you make out which ones are made of what?

You might also like:


Bisi Bele Baath | for Sala of Veggie Belly

Hot Lentil Rice : A must try signature Bangalore dish

[bee-see bay-lay bath; Kannada]

After the first blogiversary, what can be better than a guest post on a classic signature dish for a special person? I’m sure all of you are well acquainted with Sala Kannan of Veggie BellyIncredibly talented Sala needs no introduction; her photography speaks no less than a thousand words along side her diverse vegetarian and vegan recipes from all over the world that she’s discovered traveling at least 36 countries so far.

Guest posting for Sala had been on my mind for a while. When I learned of her cross country road trip and her need for guest posts, I jumped in to email my intentions. When she replied with a ‘Yes”, my joy knew no bounds…

Sala’s blog with perfectly lit beautiful photographs had me at the first look and I was hooked ever since. She has been a virtual guru to me right from my initial days of blogging even without her own knowledge. In fact, truth be told, the very first time I shot my DSLR camera in ‘Manual’ mode (for my Ghee post) was after I read her tutorial post onHow to take food photos with a bright, white, seamless background

I am ecstatic and honored more than that to be guest posting for her. In the words of revered saint and composer Sri Purandara Dasa’s “Kereya neeranu kerege chelli” (kannada) which translates to “Spilling the pond water to the pond“, I dedicate this post to you, Sala..

I couldn’t have suggested a better dish for this guest post than Bisi Bele Baath. Until she responded with “I Love Bisi Bele Baath, I’d kill to get the recipe!”, I had no clue she likes it that much. What more do I say than Bisi Bele Baath it is?

Don’t ask me. But if you do, (we) Kannadigas take pride in our Bisi Bele Bath which we undoubtedly consider as the queen of one pot meals. As with any authentic recipe, the perfect Bisi Bele Bath is quite elusive to many.

The recipe I am sharing with you here is the answer to my own quest for the perfect Bisi Bele Baath with an intoxicating aroma and a lip smacking taste after a lot of trials and nips and tucks to a number of recipes combined into one. Be prepared to lick your fingers!

Even though the “things you’ll need” list seems no short of a long list of unheard or mystical ingredients, I promise you to fear not – a tiny bit of kitchen slavery will be well worth its value in gold when this trademark signature dish of Karnataka is done..

In case you didn’t know:

Byadagi Chilli is named after the town Byadagi in Haveri district of North Karnataka. Guntur Chilli is named after the city Guntur in Andhra Pradesh. Notice how both these red chillies come from places that have hot climates averaging at least 40° C ? (about 104°F)

Mace and Nutmeg come from the same tree; nutmeg is the seed of the tree whereas mace is the delicate lacey outer orange-red covering of the seed.

 Marathi Moggu (meaning bud in kannada) comes from the buds of silk cotton tree? Wonder why it is named after Marathi though?

Bisi Bele Baath mix ingredients diptych

What you won’t find in the authentic version

  •  Aromatic/Basmati rice – Like I have said for Pongal, stick to non-sticky short grain rice. Unlike Pulao or Biryani, we do not want rice to take center stage, but rather blend in with the lentils.
  • Veggies like brinjal, okra or radish – Feel free to add any veggie of your choice. If in the name of Bisi Bele Baath, you get to incorporate different veggies into your food I’d gladly say yes. But, when you make it for a guest or a friend, stick to the list to preserve authenticity. 
  • Cumin seeds in the seasoning
  • Cilantro
  • Onion
  • Ginger/garlic

Bisi Bele Baath plated diptych

Do head over to Sala’s blog to check out my post on Bisi Bele Baath.


BISI BELE BAATH RECIPE


serves 4

print recipe

Things you’ll need:

1/2 cup Rice (sona masoori or any short grain rice)
3/4 cup Pigeon Peas (Toor Dal)
1/4 tsp turmeric
1/2 large Chayote Squash or Kohlrabi (Knol kohl) peeled, small diced
1 large Carrot, peeled, cut into 2″ long, 1 cm thick pieces
handful Green Beans, ends removed and broken into 1″ pieces
1/2 cup Double beans or Butter beans or green peas or a mix
1/2 large Green Bell Pepper (Capsicum), seeds removed and small diced
1 small tomato, diced
lemon sized seedless tamarind (adjust as per taste)
1-2 tsp Rasam powder* home made or store-bought
3 tbsp Bisi Bele Bath powder (recipe follows)
2 tbsp grated dry coconut (copra) or desiccated coconut
4 tsp peanut oil
salt

for seasoning
2 tbsp Ghee or peanut oil or a mix of both
1/2 tsp black mustard seeds
1/8 tsp asafoetida or hing
1/4 cup peanuts or cashews
4 curry leaf stalks

for the Bisi Bele Bath Powder
12 Dried red chillies – Byadagi
4 Dried red chillies – Guntur
2 tbsp Coriander seeds (dhania)
1-1/2 tsp bengal gram (chana dal)
1 tsp black gram (urad dal)
3 kapok buds (marathi moggu)
2 cloves (lavang)
1″ piece cinnamon (chakke)
2 green cardamom (elakki)
1/2 ” piece – mace / javitri / jai patre
1/4 tsp fenugreek seeds
1/4 tsp white poppy seeds (gasa gase or khus khus)
2 tbsp grated dry coconut (copra) /desiccated coconut

*optionalIf you dont want to use rasam powder as listed above, dry roast these as well:
1/2 tsp cumin seeds
1/4 tsp mustard seeds
1/4 tsp whole black pepper
3-4 curry leaves

How it’s done:

Wash and soak tamarind in warm water for 10-15 mins. Skip this if using tamarind concentrate.

Wash rice well until water runs clear, drain and let soak for 10-15 mins. Soaking ensures rice to be cooked soft. When soaked, wash lentils until water runs clear. Cook lentils with turmeric and double the amount of water and rice with 2.5 times water in the pressure cooker for 3 whistles. Put lentils in lowest container. Alternately, cook lentils and rice on stove top separately until well cooked.

Meanwhile cook cut vegetables covered in a medium pot with just enough water. Add salt mid way and switch off when the vegetables are almost cooked but hold their shape well.

Squish soaked tamarind (if using) to a pulp. Discard leftover seeds and fiber.

To make the Bisi Bele Baath Powder  While veggies, rice and lentil cook, in a kadai / thick bottomed skillet over medium heat, dry roast all the ingredients listed for the Bisi Bele Baath spice mix except fenugreek, poppy seeds and dry coconut, until fragrant and lentils turn golden brown. Remove onto a plate. Reduce the heat to low and dry roast fenugreek seeds and poppy seeds until fenugreek seeds turn golden brown. This will happen fast, so pay attention. Pour onto the plate with the other roasted ingredients. Switch off and dry roast dry coconut in the retained heat of the skillet until golden brown. If you are not using Rasam powder as listed above, optionally dry roast mustard, cumin and black pepper until mustard and cumin crackle and curry leaves crisp up. Remove onto the same plate and let cool. When roasted ingredients are cooled, grind them to a powder in a coffee grinder or a mixer and set aside. Do not open the lid, to keep the fresh aroma of the ground spices intact.

When cooker has cooled, whisk through the cooked lentils to mash well.

Heat oil in a heavy bottom pot and sauté diced green bell pepper. Add salt, diced tomato, stir and cook covered until bell pepper is cooked. Add the cooked vegetables along with the water, mashed lentils, rasam powder, salt, tamarind pulp and bring to a boil. Add rice to this and keep stirring to make sure it doesn’t burn at the bottom. Add more warm water to adjust the consistency if required.

Now add the freshly ground Bisi Bele Bath mix, stir well to break any lumps and simmer for 5-10 minutes. Check for taste and adjust tamarind, salt and spice mix. Switch off, sprinkle dry coconut on top and keep aside. Store the remaining Bisi Bele Bath mix in an airtight container.

For the tempering (seasoning), heat ghee/oil in a small kadai or saucepan over high heat. When the oil is hot enough, add mustard seeds. When they splutter, reduce heat to medium, add peanuts and stir until they crackle and turn a light brown. Now add asafoetida (hing) and curry leaves and sauté until curry leaves are crumbly crisp. Pour the tempering over on the piping hot Bisi Bele Bath, cover immediately to preserve the aroma and keep aside.

Serve hot drizzled with ghee and potato chips or Khara boondi on the side. Bisi Bele Bath tastes even better after several hours of making, which makes it a good candidate for a make-ahead meal.

Bisi Bele Baath shortcut method

Heat oil/ghee in the pressure cooker over medium-high heat and follow seasoning steps. Strain the peanuts and curry leaves and keep aside. To the seasoning, add diced bell pepper and turmeric and sauté for a bit. Add the remaining veggies and sauté, add diced tomato, salt, washed lentils, washed rice and stir well until rice turns opaque. Add tamarind pulp, rasam mix, Bisi Bele Baath mix, 5 cups of water and give it a good stir. Shut the cooker closed and cook for 2 whistles. When cooker cools, serve hot Bisi Bele baath with the fried peanuts and curry leaves. The only downside to this is some of the aroma is lost in the pressure cooking.

Notes:

Byadagi red chillies aren’t available in all the Indian grocery stores. Substitute for Byadagi – any high on color and mild in heat variety will do. For Guntur- any high on heat (usually low on color) variety will do.

For larger quantities, remember lentil : rice – 1.5 : 1 and rice to water ratio of 1: 4 or 5

Mace (Javithri) much like cloves is best appreciated in small quantities. Use it more and it can overpower the aroma and taste of the spice mix

Some like to add potatoes. But, I’d rather not as potatoes tend to absorb all the spices, neutralize them and impart their raw earthy taste.

If you want to skip making the spice mix from scratch or don’t have the ingredients, store-bought MTR Bisi Bele Baath powder is good enough for instant gratification.

Marathi Moggu (Kapok Buds) are not available even in Indian grocery stores where I live, so I brought a small stash on my India visit. However, I recently found that they are sold online.

Before peeling Chayote squash, slice of the ends; rub the cut open end with the chopped slice until the white froth ceases. This takes away the bitterness, if any.

Store leftover Bisi Bele Baath mix in an airtight container either in the refrigerator or in the freezer to keep the aroma fresh.

Also, Come join the fun at the My Baking Addiction and GoodLife Eats Holiday Recipe Swap sponsored by Le Creuset – I’m sending Bisi Bele Baath to the list of One Pot Meals!

You might also like: